

January 30, 2005
I started making Em's Pink
I started making Em's Pink Beads Socks, and seeing as a few people had contacted me about knitting with beads, I decided to post how *I* knit with beads. Enjoy!
Step-by-Step Beading Tutorial
This is how I did my beaded sock. This is not the only way to knit with beads, but this is how I do it.
The yarn used in the demonstration is Lornas Laces Shepherd Sock, and the beads are size 8/0 Mill Hill beads.
First of all, stringing the beads.
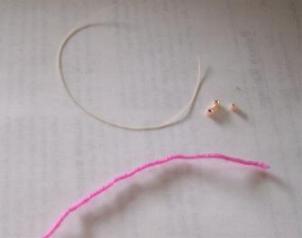
I use a jumper thread. In this case I have used sturdy beading thread, but any thread, even ordinary sewing thread will work.
I fold the yarn in half, and fold the jumper in half, so that each has a loop, then I loop them together.
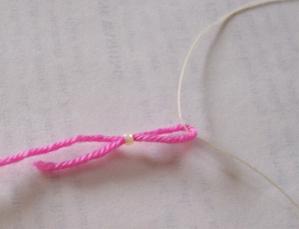
Holding the two ends of the jumper together, I thread the bead onto this finer thread, and down over the joined loops onto the yarn.
For the beaded socks, there were over 200 beads, so after Id threaded them all on (no fast task!), I pushed them down out of the way, then commenced the sock.
Other people knit the cuff first, then break the yarn, and thread the beads. I dont like to sew in ends, so I do it this way, pushing the beads further down the yarn as I knit the cuff.

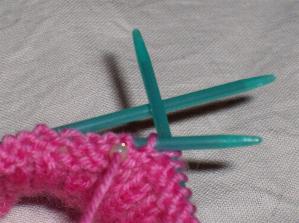
Now Im ready to begin knitting the beaded portion.
To prepare, I push a bead to the back of my knitting.
Then, I start to knit the stitch as normal, with the bead close to the knitting.
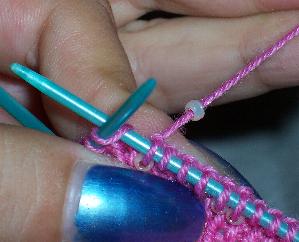
I wrap the yarn around the needle, with the bead sitting between the needles.
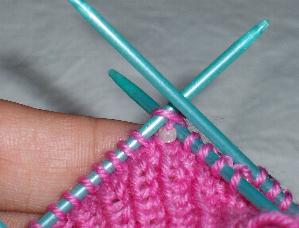
It is important that the bead is securely between the needles. Sometimes it needs to be pushed into place.
The pull the stitch through as you normally would.
My stitches look like this when Im done.
Continue the first round in the same manner.
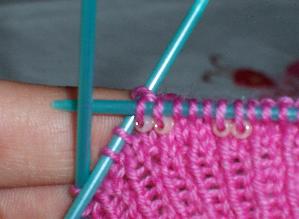
When you get to the second round, be careful of the beads in the stitches from the row before.
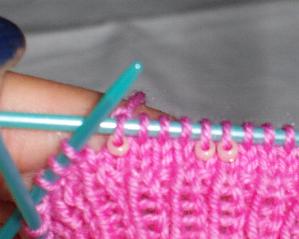
I insert the needle above the bead when preparing to knit the next stitch otherwise I find that the bead escapes to the back of my knitting. The stitch above keeps the bead in place.
Then I finish the stitch as outlined above.
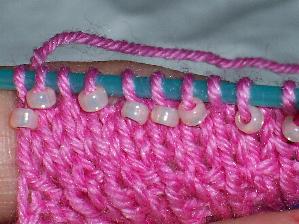
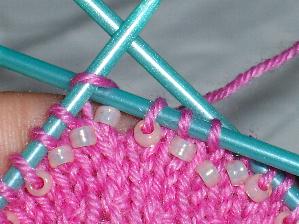
At the end of the second row, this is how my knitting looks. The beads sit on the right hand arm of the stitch when completed, the next row of beads sit above. There is no need for a spacer row between each bead.
After all the rows are done, this is how my pattern came out.
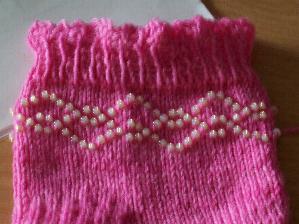
This pattern is different from the first Pink Bead sock, as I didnt have enough beads left for Ems socks, so I just altered the beading pattern. It will make it easier to tell them apart, too :)
Posted by Donna at January 30, 2005 12:11 PMComments
Yep, just as I suspected, I'm never going to knit with beads! :-)
Posted by: Evelyn at January 31, 2005 12:55 PMThanks for the excellent bead tutorial! I've never understood how to knit with beads and I really needed to see this.
Posted by: Debbie/St. Louis at February 1, 2005 01:13 AMThanks for the tutorial. The sock looks sweet and you make it look very easy.
I'm going to have to try this again. I did some beaded lace edging for a baby dress many years ago but forgot all about how much fun it was.
This is a great way to embellish socks. My daughter will love it. She's the recipient for test garments.
Posted by: Sarah at February 27, 2006 03:51 PM
Hi.. just wanted to thank you for your detailed step by step sock beading pictures ..... I love it and I think I will try again - your way. Thanks
Posted by: Sandi Benward at January 30, 2005 01:41 PM